I’ve been toying around with openCV for generating MRI images with synethetic motion injected into them. I’d never used this library before, so I tested a couple examples. Below I detail a few tools that I found interesting, and that can quickly be used to generate image transformations.
# import necessary libraries
import matplotlib.pyplot as plt
import nibabel as nb
import cv2
# load image file
image_file = './data/T1w_restore_brain.nii.gz'
img_obj = nb.load(image_file)
img = img_obj.get_data()
# reorient so Anterior-Posterior axis corresponds to dim(0)
img = np.fliplr(img)
img = np.swapaxes(img, 0, 2)
# get single image slice and rescale
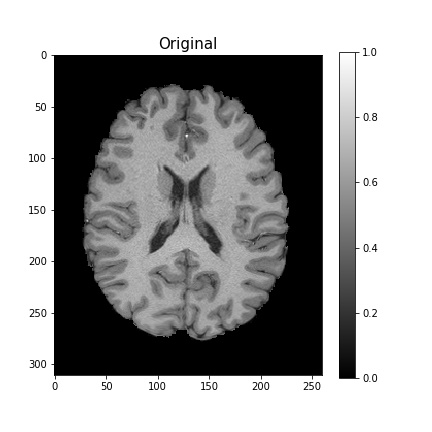
data = img[130, :, :]
data = (data-data.min())/data.max()
plt.imshow(data)
For any linear transformations with cv2, we can use the cv2.warpAffine method, which takes in the original image, some transformation matrix, and the size of the output image.
Let’s start with translations. The matrix will translate the image 10 pixels to the right (width), and 0 pixels down (height).
# Use the identity rotation matrix
# Third column specifies translation in corresponding direction
translation = np.array([[1, 0, 20],
                        [0, 1, 0]])

translated = cv2.warpAffine(data, translation, data.T.shape)
plt.imshow(translated)
![]()
Now, in order to rotate the image, we can use cv2.getRotationMatrix2D. We’ll rotate our image by 45$^{\circ}$ .
# get shape of input image
rows, cols = data.shape

# specify angle of rotation around central pixel
M = cv2.getRotationMatrix2D((cols/2,rows/2), 45, 1)
rotated = cv2.warpAffine(data, M, (cols, rows))
plt.imshow(rotated)

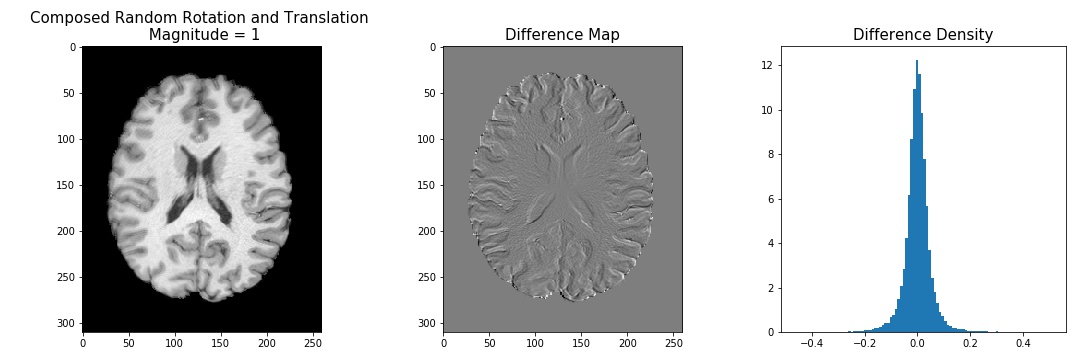
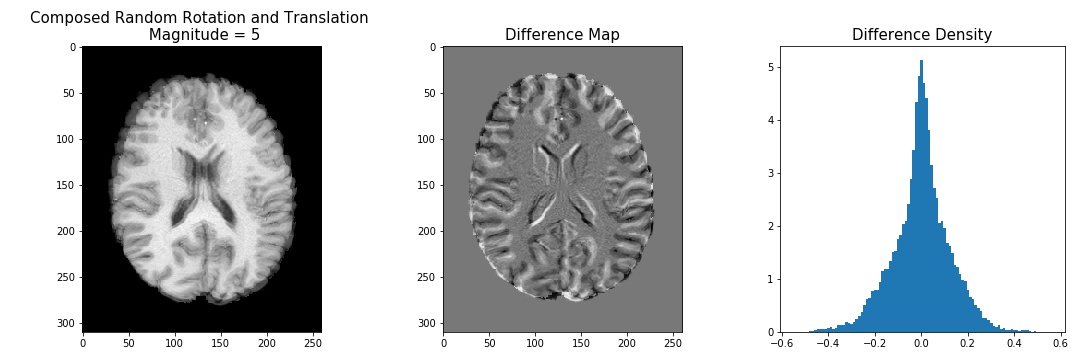
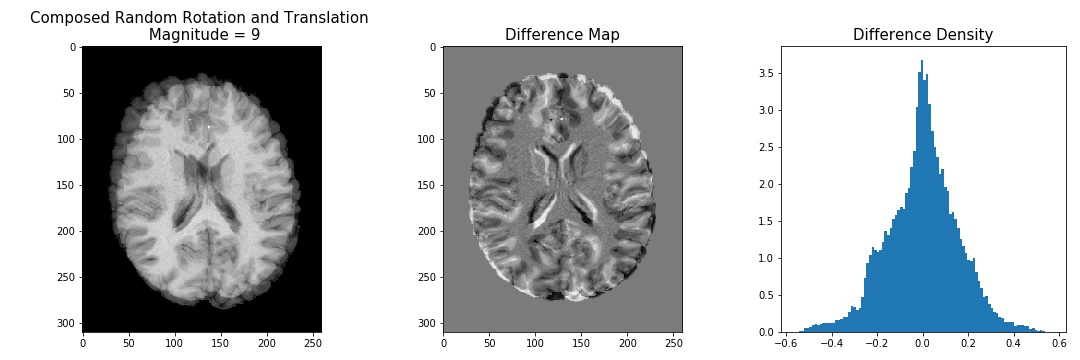
Here are a few examples of randomly translating +/- 1, 5, or 9 voxels in the X and Y directions, and randomly rotating by 1, 5, or 9 degrees:
# get shape of input image
rows, cols = data.shape
# specify range of rotations and translations
txfn = [1, 5, 9]

for rt in txfn:

    # generate rotation matrix
    # randonly rotate to left or right
    M = cv2.getRotationMatrix2D(
            (cols/2, rows/2),
            np.random.choice([-1, 1], 1)[0]*rt, 1)

    # apply rotation matrix
    rotated = cv2.warpAffine(data, M, data.T.shape)

    # generate translation matrix
    # randomly translate to left or right
    T = np.array(
            [[1,0,np.random.choice([-1, 1], 1)[0]*rt],
            [0, 1,np.random.choice([-1, 1], 1)[0]*rt]]).astype(np.float32)

    # apply translation matrix
    translated = cv2.warpAffine(data, T, data.T.shape)

    # compose rotated and translated images
    movement = (rotated + translated)/2
    # compute difference between input and transformed
    difference = data-movement
    res = difference.reshape(np.product(difference.shape))

    fig,[ax1,ax2,ax3] = plt.subplots(1,3,figsize=(15,5))
    ax1.imshow(movement, cmap='gray')
    ax1.set_title('Composed Random Rotation and Translation \n Magnitude = {:}'.format(rt), fontsize=15)
    ax2.imshow(D-rotated, cmap='gray')
    ax2.set_title('Difference Map'.format(rt), fontsize=15)
    ax3.hist(res[res!=0],100,density=True)
    ax3.set_title('Difference Density', fontsize=15)
    plt.tight_layout()
    plt.show()
While this approach of generating synthetic motion into MRI images is a poor model of how motion actually occurs during an MRI scan, there are a few things I learned here. For example, if you define a measure of image similarity, like mutual information, entropy, or correlation ratio as a cost function, we can see how we can use warpAffine to find the optimal transformation matrix between two images.
I was hoping to use openCV to generate and apply 3d affine transformations to volumetric MRI data. One approach to doing this is to iteratively apply rotations and transformations along each axis – however, openCV will interpolate the data after each transformation, resulting in a greater loss of signal than I am willing to compromise on. It doesn’t seem like openCV has ability to apply 3d affine transformations to volumetric data in a single interpolation step.
A more realistic approach to generating synthetic motion artifacts that would more accurately parallell the noise-generating process, is to compute the Fast Fourier Transform of my 3d volume, and then apply phase-shifts to the k-space signal – this will also manifest as motion after applying the inverse FFT.
After doing a bit more digging through the openCV API, it seems there’s a lot of cool material for exploration – these applications specifically caught my eye and would be fun to include in projects:
- video analysis for motion tracking
- object recognition for detecting faces
- openCV Android for app development
But alas – the search continues!